HRO
National HRO Renovation Project
My Autumn project this year has been the renovation of an old HRO receiver that I picked up on ebay. This is another receiver that I have always wanted to have. Many years ago when I was still at school I was given one, along with power supply and coils. I carried it home with my friend on the bus all the way from Bury. I never got to use the receiver because I gave it to my friend as he didn’t have a receiver of his own.
Now I have one of my own with a full set of coils to renovate and have pride of place in my shack.
The HRO and coils were in a poor state having been stored for many years, covered in rust and full of dead spiders! However, the inside and underneath was untouched and in its original state. Ideal for a renovation project.


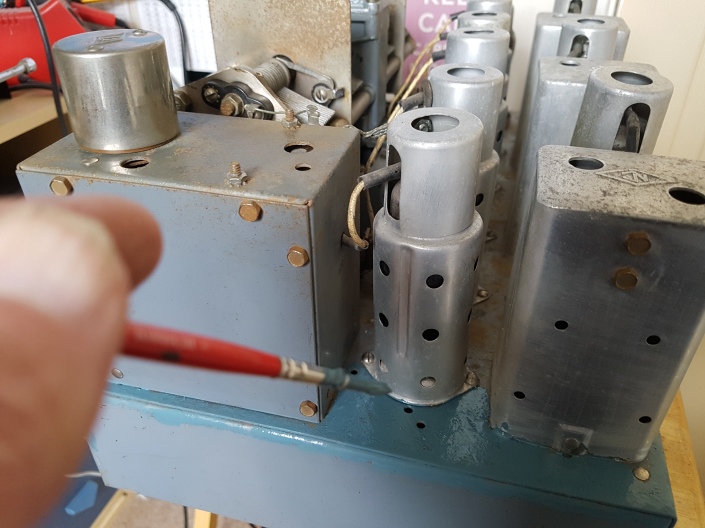
I didn’t even think about powering up this baby yet, first some cosmetic work was needed, it needed a good cleaning and some of the rust removed. I removed the case and front panel and set about cleaning with a wire brush and metal polish. Taking the covers off the valves were quite tricky as they are a tight fit and it is tempting to twist the cover which would also twist the class on the valve causing the glass to separate from the base. This had already happened with one valve in the past.
After a good clean I decided to paint the chassis and cover up the rust patches. I have lots of small tins of Humbrol model paint that I use for model making and realised that the HRO chassis colour is actually Pru-Blue and I have that colour. Painting needed a lot of patience with a small paint brush, but the results are amazing, I am very pleased with the results.

The next step involves a rebuild under the chassis by replacing all the wax capacitors and old resistors. I managed to get all the capacitors (10n and 100n, 650v) on ebay and got all the 2 watt resistors from Modern Radio in Bolton. Identifying all the components was fairly straightforward from the original HRO manual, to make things easier I took photos of the underside of the chassis and labelled all the components. Rebuilding was an enjoyable experience, I had to call on my soldering skills to change all the components while keeping everything neat.
The layout and wiring of the HRO receiver is easy to follow and everything is done logically. A pleasure to work on!

At the same time I also worked on the plug in coil units. They need stripping right down and cleaning, some were in a poor state. After cleaning the coil units the paint work needed some renovating. At first I was going to re-paint the fronts of the units, but I found an easy way, I used a cheap permanent marker pen. This really worked well! The graphs on the front of the coil units needed a bit of TLC, they were originally covered by Perspex, but had all perished. As I removed the metal frames I had to be careful not to disturb the paper graphs. Some were stuck to the metalwork, so I had to carefully peel them off without ripping them. I managed to find copies of the graphs on the internet, so I printed off the bandspread graphs to put in the second metal frames.
The coil units came in the original HRO wooden storage rack, after cleaning I painted it black with matt spray paint.


Now the moment of truth…will it work?
I had not built a power supply yet, but I already had a Codar AT5 power supply that I built previously which should be fine to power up the HRO.
At switch-on the filaments glowed nicely and after warm up a loud hum started to appear from the speaker, but nothing else. This is where I had to call my fault finding skills.
I managed to trace the fault down to the 6B7 Detector/AGC/Audio Valve. After a hunt on eBay I found a new valve cheap and ordered it. When it arrived I changed the valve and switched on.
It works!
All the controls were working fine, but there was a problem with the S Meter. To solve that problem I found an old article in Short Wave Magazine which suggested a modification. I carried this out and the S Meter worked fine. The original S meter had a horrible yellow face and the numbers had worn off, so I made a new one.


Finally, it was time paint the case and front panel then build a power supply for the HRO. I needed a suitable Mains Transformer, Smoothing Choke and Smoothing Capacitor. First of all I measured the current being drawn from the AT5 power supply, this was about 50ma. So I searched on ebay to find something suitable. I managed to get all the components at a reasonable price. I also needed a case for the PSU. On a visit to the rally at Rochdale I found an old CB PSU which was an ideal size. I stripped it down, gave it a coat of black paint and began building the HRO PSU into the case.

This has been a wonderful project, I now have a fully working HRO Receiver and set of coils that has pride of place in my shack!
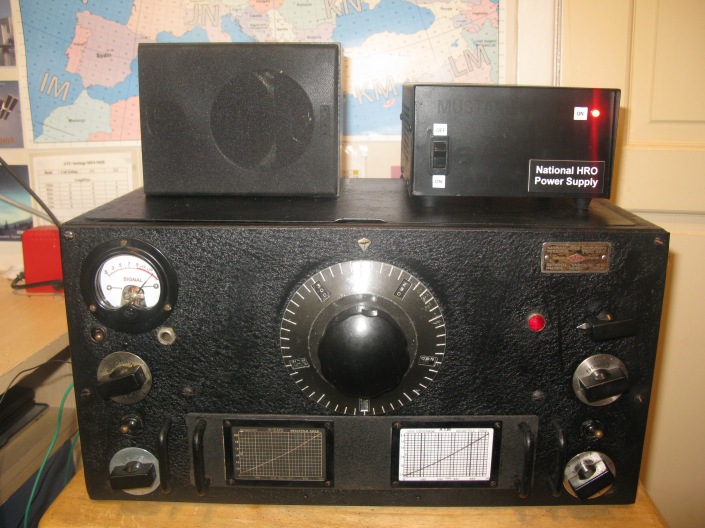

A very useful addition for the HRO is a frequency counter. The HRO frequency readout on the dial together with the coil graphs are somewhat inaccurate. An external digital readout would be ideal. Frequency counters complete with IF offsets can be found very cheap from China on e Bay. I sent for a nice large, blue 60Mhz counter and mounted it into a project box.
